Drag and Drop in React (part 2)
Uploading files using drag and drop
For drag and drop upload feature, we will use a React library called react-dropzone.
yarn add react-dropzoneLet’s create a new file called Dropzone.js. This component is responsible for making a simple content area into a dropzone area where you can drop your files.
react-dropzone will show the beautiful custom dropzone area. It uses HTML onDrag events to capture the files from the event. Upon clicking the dropzone area, it initiates file selection dialog through the hidden input using React ref and allows us to select files and upload them.
Let’s create our component called Dropzone:
/*
  filename: Dropzone.js
*/import React from "react";
// Import the useDropzone hooks from react-dropzone
import { useDropzone } from "react-dropzone";const Dropzone = ({ onDrop, accept }) => {
  // Initializing useDropzone hooks with options
  const { getRootProps, getInputProps, isDragActive } = useDropzone({
    onDrop,
    accept
  });
  return (
    <div {...getRootProps()}>
      <input className="dropzone-input" {...getInputProps()} />
      <div className="text-center">
        {isDragActive ? (
          <p className="dropzone-content">Release to drop the files here</p>
        ) : (
          <p className="dropzone-content">
            Drag some files here, or click to select files
          </p>
        )}
      </div>
    </div>
  );
};export default Dropzone;
getRootProps– these are the props which will be set based on the parent element of the dropzone area. So this element determines the width and height of the dropzone area.getInputProps– these props are passed to the input element. It is needed so that we can support click events and drag events to get the files.isDragActivewill be set if the files are dragged above the dropzone area. This will be very useful to make the styling based on this variable.
We used accept props to only allow image files. Our App.js should look like this:
/*
filename: App.js
*/import React, { useCallback } from "react";
import Dropzone from "./Dropzone";import "./App.css";function App() {
  const onDrop = useCallback(acceptedFiles => {
    console.log(acceptedFiles);
  }, []);  return (
    <main className="App">
      <h1 className="text-center">Drag and Drop Example</h1>
      <Dropzone onDrop={onDrop} accept={"image/*"} />
    </main>
  );
}export default App;

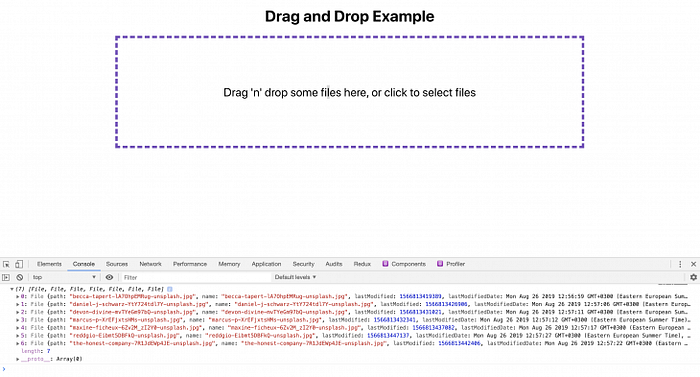
We have added the dropzone component in the main page. Now, if you drop the files, it will console the dropped image files.
acceptedFilesis an array ofFilevalues. You can read the file or send the file to the server and upload. Whatever process you want to do, you can do it there- Even when you click the area and upload, the same
onDropcallback will be called acceptprops accepts mime types. You can check the doc for all supported mime types. It supports all standard mime types and also match patterns.onDropfunction is enclosed in auseCallback. As of now, we didn’t do any heavy computing or send the files to the server. We just console theacceptedFiles. But later on, we will read the files and set to a state for displaying the images in the browser. It is recommended touseCallbackfor expensive functions and avoid unnecessary re-renders.
Lets read the image files and add it to a state in App.js:
/*
filename: App.js
*/
import React, { useCallback, useState } from "react";
function App() {
  const [images, setImages] = useState([]);  const onDrop = useCallback(acceptedFiles => {
       acceptedFiles.map(file => {      const reader = new FileReader();
      reader.onload = function(e) {
        setImages(prevState => [
          ...prevState,
          { id: cuid(), src: e.target.result }
        ]);
      };
      reader.readAsDataURL(file);
      return file;
    });
  }, []);  ...
}
The data structure of our images state is:
const images = [
  {
    id: 'abcd123',
    src: 'data:image/png;dkjds...',
  },
  {
    id: 'zxy123456',
    src: 'data:image/png;sldklskd...',
  }
]
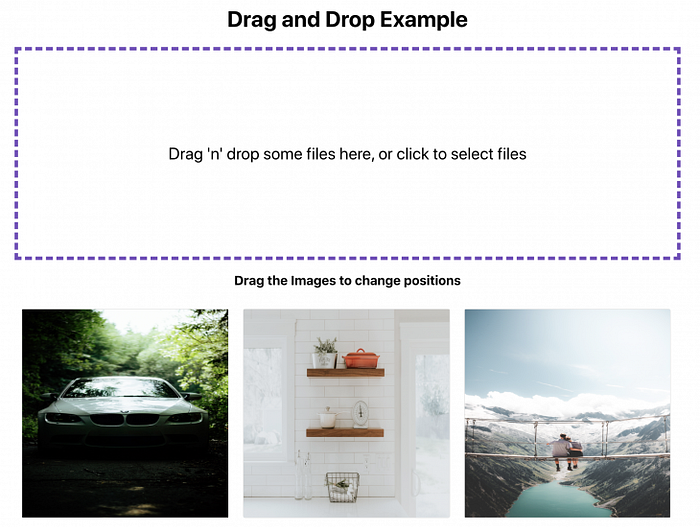
Let’s show the images preview in a grid layout. For that, we are going to create another component called ImageList.
import React from "react";
const Image = ({ image }) => {
  return (
    <div className="file-item">
      <img alt={`img - ${image.id}`} src={image.src} className="file-img" />
    </div>
  );
};// ImageList Component
const ImageList = ({ images }) => {

  // render each image by calling Image component
  const renderImage = (image, index) => {
    return (
      <Image
        image={image}
        key={`${image.id}-image`}
      />
    );
  };  return <section className="file-list">{images.map(renderImage)}</section>;
};export default ImageList;
Now, we can add this ImageList component to App.js and show the preview of the images.
function App() {
  ...  return (
    <main className="App">
      <h1 className="text-center">Drag and Drop Example</h1>
      <Dropzone onDrop={onDrop} accept={"image/*"} />
      <ImageList images={images} />
    </main>
  );
}
We are now able to upload files using drag and drop and also be able to see a preview of the images.

